Thursday, November 17, 2011

Kitchen Reno [ Part 2 of MANY !! ] ;o)

Yesterday I started to fill you in on the second stage of our kitchen renovation, and today you get to see the tiles and worktops.

The existing worktops when we moved into the house were PINK !! and not just a pinky tone mixed into something else.. no full out Dusty Rose PINK !

Here's a photo of the original kitchen in all it's orange, pink and green glory. Yuck !

See !! I said it was pink.
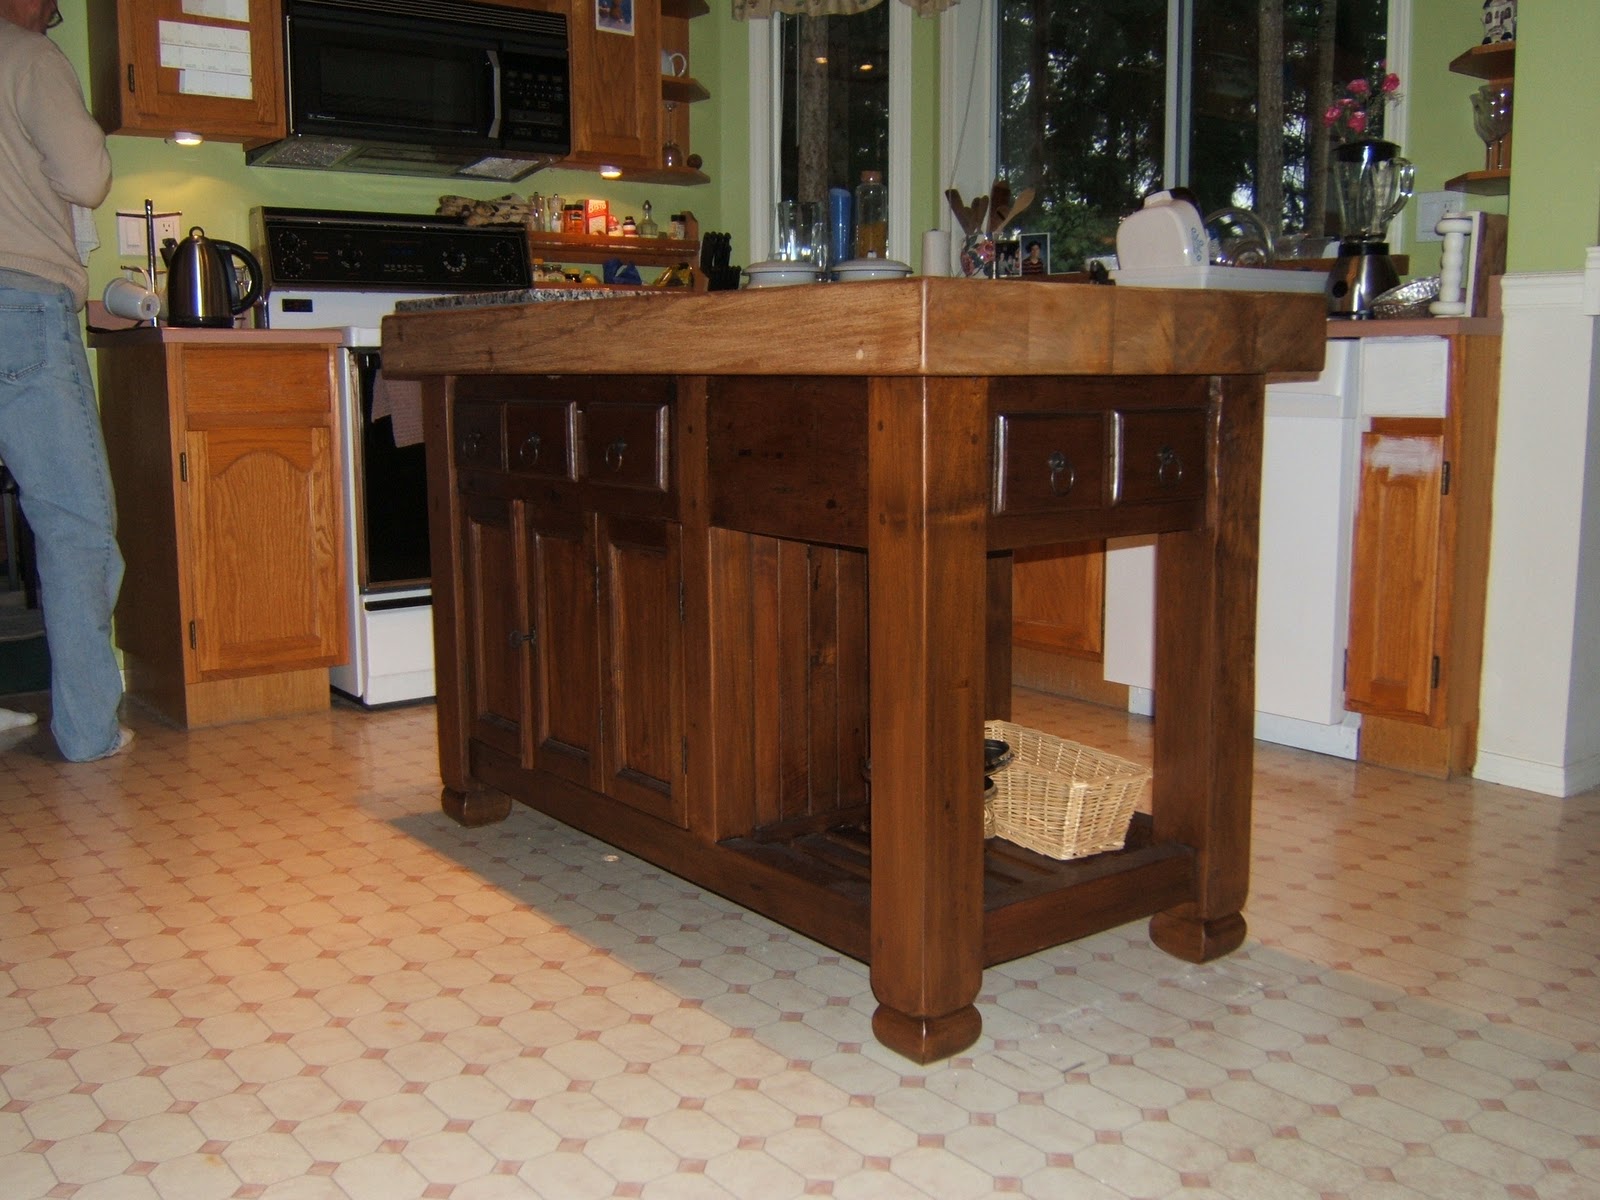
This photo also shows the original kitchen island.. you can just see it in the bottom left hand corner.
It had a tiled counter, which believe it or not also had a pink undertone to it. Another of the reasons why we chose to switch it out for Bill's beloved Teak jobbie.

You can also see clearly the way they typically finish counters in this part of Canada .. which is to wrap the counter surface up the wall about 3 inches..
Once the Quartz goes in though it will look like traditional British counter with no extra back bit.

You can see that there are NO tiles between the worktops and the underside of the cupboards either... and of course that will change now too.
 
Butternut Rum laminate.

So obviously the first thing that had to go was the pink and as I mentioned yesterday I replaced it with a laminate called Butternut Rum..

I have to say it has been incredibly servicable, and was a great colour for hiding the dirt.. which as my sister will tell you is an impt factor in many design choices. Just kidding..  ;o)

Being a laminate it was also inexpensive, and since we chose a shiny finish.. which was newly available back then, several people who've been to the house even thought it was granite... 'Til they got up close.. ;o)


We used a local company called Colonial, who specialise just in worktops.  They have 5 or 6 branches on the Island and the BC Interior, and their service was super so I'm going there again.
All the local builders use them, and I remember when I was looking the first time I went to a local Kitchen company to see what they had to offer and the chap said to me.. 'you might as well go to Colonial direct, because if you order counters from me I'll just go to them to buy them'. What a nice man ;o)

I've picked a Quartz rather than a Granite because; it's harder wearing, I liked the colour choices better AND it's cheaper... so result !!
Cambria, the company that makes the range we chose from, call all their options after British place names.. but I didn't let that sway me.. Honest !!

Cardiff Cream... too yellow !!


We looked at several options, and brought 3 samples home. [ To see photos of all the samples I looked at, click on this link ]

The first choice 'Cardiff Cream' we dismissed straight away because it was too yellow.

The original idea being to use white subway tiles with a stripe of glass mosaic tiles through it.. so the tiles made the 'Cardiff Cream' look dirty.


One the pieces called Brecon Brown, was very similar to the Butternut Rum..  and in fact both Bill my hubby..  and Bill my builder..  liked this one best.
Of course they are both colour blind.. but that really didn't affect my decision. ;o)
I was tempted to go this route because the floor and the teak island naturally have the same warm brown tones, because the laminate was chosen to compliment them.. so it would have been the sensible safe option.

The final choice, Newcastle, has an off white base with flecks of chocolate, smoke, black, cream and mocha colours in it.
It was my favourite sample almost from the start.. but I was still drawn to the safer Brecon Brown, if only because we already knew that the colours and tones in it worked with the kitchen..

So what did I choose ??

Drum roll please ;o)


Yes.. no surprise really I picked the New Castle.. actually this photo makes it look more yellow than it is.. hang on I'll get a better one..


There that's better...

I went for this in the end because: 
1. the contrast between the Brecon Brown and the white subway tiles was a bit too sharp for my liking, and
2. because our kitchen faces north west and is surrounded by 100 ft pine trees so it can be quite dark.
I think the lighter counters will help to lift the light level in the room.. Hope it does anyway.

So having picked this we took the other samples back and set about trying to find a glass mosaic for the stripe through the subway tiles.

Lots of tiles sheets were bought.. and lots were returned.  Sigh !!
Some worked beautifully with the tile..
Some worked beautifully with the worktop.. but nothing worked with both.
We did have a stand out favourite.. but it didn't work with the subway tile..
Mostly because in some places.. like behind the sink for instance.. there is so little backsplash ['cos of the window] that there wasn't enough room to fit a stripe.

Then hubby had a brainwave.. Yes !! it does happen !!
Scrap the subway tile and have all glass.. so that's exactly what we're going to do..
and here's the tile..

It's got a mix of watery blue and green glass tiles, and a tumbled marble that matches the tone of the base colour in the counter exactly..


The light from the undercabinet halogen spots make them glitter like jewellery.


I LOVE them !!!

So I've ordered the counters, which will be about 6 weeks, what with Christmas etc... and that suits me 'cos Bill the contractor's tied up 'til Jan anyway.
The tiles are a stock item at Home Depot so I'm going to wait to buy them because about once every 3 months HD has a tile sale.. and I might get a bargain..

I've hired a painter [ a guy Bill Larson uses ] to repaint the walls in the kitchen and breakfast nook, plus the ceiling in the kitchen, nook and family room.
I normally do all my own painting but the idea of 'cutting in' the walls to the ceiling above the cabinets was more than I could stand, so I'm going to pay a pro to do it.. and then if it's no good I have someone to shout at.
He's coming in the morning actually..
At least that way the walls will be tidy for the Christmas House Tour which is rushing towards me.. more on that tomorrow.

And there you have it.. still not fully decided on the sink.. but I'll decide over the weekend.

Have to go take all the breakables off the shelves before the painter comes..
See you all tomorrow

Jo xx


Wednesday, November 16, 2011

Kitchen Renovations [AGAIN !!]

When we first moved into our house the kitchen was VERY typical for the age of the house [1990] and the area we live in.
Oak cabinets, pink.. yes PINK worktops, shiny lino, and a mish mash of second hand appliances that came with the house. [That happens quite commonly here.]

I did a fairly major reno over the course of the first couple of years we lived here, new floors, new appliances, new island, painted the units, light fixtures etc etc.
I will show you all of this I promise in a series of posts in the new year.. there's an awful lot to see.

It was clean and big, but needed to be introduced to the 21st century.
But for now I'm in the process of doing the second [and final I bloody hope] phase of the renovation... which involves tiling the backsplash and putting in quartz counter tops.

Now we've already changed the wortops once, as part of the original update, but at the time I chose a laminate called 'Butter-nut Rum'.
It was a cost thing really.. I needed to change the counters in all 3 bathrooms too [YES they WERE also PINK !!] and what with all the other expenses something had to go..
Plus my other half fell in love with a free standing kitchen island made from 450lbs of reclaimed Indonesian teak.. and it cost the same as the granite... so it was an either/or thing.

Took five guys to get her into the house..
I loved the island too.. plus to be honest I'm not all that prescious about granite counters.. so it wasn't that hard a decision.
Now though, 7 years after we did the initial reno, and with an eye on maintaining the value of the house we've decided that we should just do this last thing to really push the kitchen from nice to spectacular.

It was really the great job that our contractor Bill Larson did on the family bathroom that convinced me that it would be worth doing.. I have absolute confidence in Bill and that made the decision to spend the extra money on the kichen a much easier one to make.
I can't stress how important it is to have a builder you can trust before you commit to renovations this expensive, if only to relieve the stress of it all.
When you know it's going to look great, it feels more like an investment and a little less like just spending money ;o)

So I've spent the last 6 weeks looking at granite options and tiles... plus I'm going to invest in an under mount sink and a new tap.

The current ones were also new when we first did the kitchen.. I do love our tap actually, but it's very traditional, almost Victorian, and I fancy something sleeker.
It came from a Home Depot bargain bin, and only cost about $60 [30 quid] so it was cheap as chips..

The sink wasn't much more and I'm donating them to Habitat for Humanity, so I don't feel bad about swapping them out so soon.

Initially I thought I wanted another tap of a similar style and I found this one at Home Depot --->>

It's a total bargain @ $129 but it's brushed nickel rather than stainless so it won't match the sink or the appliances.


Then today I was looking at sinks, and I have a couple of favourites.. both of which would work better with a crisper more modern line, so I think I'm settled on this tap from Delta's Tommy Collection..


It's hardly expensive @ $250 and it's a very nice quality so I think this is the way to go.

They only had a photo of the chrome version.. but it comes in stainless so I've ordered that.


OK.. so now the sinks..
I thought about a Butler [or Belfast] sink, but frankly they were a fortune.. even in just stainless steel I was looking at $2000 PLUS. Buggar that for a game of soldiers. ;o)
So back to a traditional double sink.

I've narrowed it down to two, so now it's a toss up....

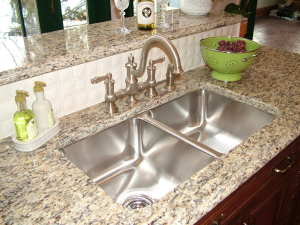
1st this one from a company called Elkay, who do very high end sinks for builders.
They have a special deal with Home Depot though, so I can get this commercial looking one with deep straight sides for $399..

Not sure if the sharp corners will be dirt traps, but LOVE the look.


Or this chappie from Kindred.. which is a brand made by Franke, who any plumber will tell you make the best sinks in the world.

Seems these people went with a traditional tap, but the colours don't work do they.
It's a softer rounder look, which may well be easier to keep clean and there's not that much difference in the cost.. it's about $120 more than the Elkay.

I really haven't decided yet, so I'm going to sleep on it, and tomorrow I'll show you the new granite and the tiles we've chosen, and maybe share my decision on the sink..
If I've made it that is ;o)

Jo xx


Tuesday, November 15, 2011

Back in the Saddle

Yes.. yes.. I know.. where the hell have I been you say ??
Nowhere interesting I assure you ;o) But I'm back now and raring to go.
I have also been getting on with things in the house so I have lots of stuff to show you guys.

I've also been invited by the Anderton Theraputic Garden Society to take part in their Christmas House Tour this year.. both as a Home Owner AND as a Decorator. Read this post from last year and you'll see what it's all about.

A fat happy Snowman from my personal collection.
This year the event takes place on November 25th and 26th, with all the proceeds going to support the Society's work. I'm getting quite excited to be honest, although now and again I catch myself wondering what on earth I've gotten myself into. ;o)
Over the next 2 weeks I'll post about the 2 homes from last year that I took photographs of but never had a chance to blog about.. and keep you up to date with my progress on the decorations here.

I also want to fill you all in on what exactly has been going on with the house in general.. and will finally post some AFTER photos of some of the projects that you've seen the BEFORE photos of. I promise I won't keep you all waiting so long again.

One of the really big redecorating jobs we've done this year is in our family bathroom.
Here's just a little teaser.. but as you can see, this was more than just a spit and polish..
 
Where did the bathroom go ??

I love a bath.. it's the only time I ever can relax enough to just read a book.
Unfortunately as you will see from the before photos our bath was the size of Australia.
You think I'm joking ?? well think on.
It took 20 mins to fill it, used a whole tank of hot water, and then when I got in, my feet
couldn't reach the end without my whole body being submerged..
Not very condusive to reading since the book always got wet. As a result I never used it and that's such a waste, so after an initial makeover when we first moved in I bit the bullitt and
went the whole hog.
You'll see the results over the coming weeks.

We've found a wonderful local contractor called Bill Larson who's been working with me..
I'll tell you the story of how I found him.
He's done 3 jobs for us already and when he's finished basically building a house for his current client he's coming back to do our en-suite, tile and paint the kitchen and panel the hall.

So lots more to come, now my motivation is back.. with features on more of my favourite stores, hints and tips on how I make my decorating pounds/dollars stretch farther, and before and afters on the kitchen, the study, well pretty much every room in the house really.
Here's another teaser for you.. this is what the study looked like before we moved in..

Oh my God.. just look at the colour of that window frame !!
That's not our furniture I hasten to add.. it belonged to the previous owners. Although to be fair to them, the decor belonged to the owner before that. It looks very different today.. thank heavens. ;o)
So I hope I've whetted your appetite, and you'll come back tomorrow to see what's next.
Off to bed now.

Jo xx


Thursday, June 2, 2011

Making over a $5 bargain.

My first post back after a very long time features a little project I've been intending to do for about 3 years. That's typical of me btw.. shocking procrastinator. ;o)

Anyway.. the aformanetioned project was to re finish or recover this little chap..

I bought this 24 inch square storage cube about 3 years ago at the Salvation Army Charity/Thrift shop for the massive sum of $5 [about 3 quid].


It was covered in a hideous brown leatherette material, but it was a good size, and I knew it would be really handy.

I immediately filled it with magazines and assorted other junk.. put it in my living room and set about finding an appropriate fabric to recover it with.
And that's where it has stayed ever since.

Over the years I've bought assorted bits of material with the intention of using it for the poof.. but they either got used for other things or didn't quite work.


Then last week hubby and I were in Victoria and I finally found the perfect fabric.

For the last little while I've felt that our Living Room needed an injection of both colour and pattern.
Of course this has in part been due to the fact that all those 'in the know' as it were, have been calling for more of both in home decor for some time now.
Anyway Chintz and Co in Victoria has a great fabric dept, which is lacking in my neck of the woods, so I didn't waste the opportunity to have a good old nose around.

There were two options that I considered..


The top one is a bold graphic with a vaguely Morrocan feel about it..that came in a linen texture...
or the bottom one which has a distinctly English Country garden flavour and was 100% cotton.

I plumped for the floral for a couple of reasons.. Firstly there's already a floral inspiration on the curtains in that room and secondly the lines of the room are tending towards the boxy. I was afraid the graphic would only enhance that feeling and my intention is to soften it.
So I bought two metres of the floral which I think is a Waverly fabric and is called Charlotte.

First thing I did with the cube was to unscrew the hinges and separate the lid from the bottom..


There was a strip of the tacky leatherette connecting the lid to the bottom..

But as you can see from this photo it wasn't hard to remove ;o)

It was always my intention to leave the existing covering in place..  although I suspect having examined the piece a bit more closely, that the hideous fake leather was ITSELF a make over..
so I could probably have taken it off.


In the end though I left it on, but I did remove the loose piece on the inside that was just there to cover up the staples.


So I've got it in 2 pieces and I also removed the four little metal feet with a view to putting them back on once the new fabric covering was in place.
Next job was to cut the fabric to fit around the bottom.. I measured that I needed 19 inches width to wrap the bottom from underneath into the inside...
The fabric I had was 54inches wide by 2 metres long so I just cut 19 inches off the width right down the full length of the piece. That gave me a strip 19 inches by 2 metres.


It wrapped perfectly round the sides of the base, with a bit of a fold to neaten the edge.. and I used my favourite thing in the whole world.. white duct tape.. to hold it in place whilst I stapled it both underneath and inside. The inside corners were a bit of a bugger.. but you just have to fiddle a bit until they're neat enough to satisfy you.
Once the bottom stapling was done I banged the feet back in.. which was handy because they add some additional security to the staples.

Next I did the same with the top by cutting a square out of the remaining fabric big enough so that it covered all of the old leatherette on the inside of the lid. That was easier to do because there was at lease a bit of plywood to staple into... God knows what the sides are made of.

Once the lid was covered, I reattached the newly scoured and cleaned hinges to it, and I tidied up the raw edges of the fabric and the staples with some more white duct tape.
I then used an offcut and made a square piece to cover my workings.
No sewing.. I used Wundaweb to seal the edges...


AND... I used Wundaweb to attach it to the inside of the lid too, which covers up all the staples and duct tape underneath perfectly.


Wundaweb btw is just an English brand name.. any old bonding type product will do the job just the same.


Plus because I'd already screwed the hinges back in.. the fabric 'patch' even covered the screwheads on those.

I must admit I was really pleased with the results.. it gave a really sharp and neat finish.

And I was surprised at just how easy it was..


The final stage was to re attach the hinges to the bottom.. which hubby had to help me with... but only because I needed an extra pair of hands.
I did then have to come up with an alternative to the strip of leatherette to act as a connector between top and bottom to prevent the lid falling back and breaking the hinges.
A bit of lateral thinking and I came up with this...


This photo shows how I used my beloved white duct tape to finished off the inside of the box too.. which I know isn't perfect, but frankly when it's filled with magazines and stuff, you can only see the fabric covered part anyway. The chain is from a piece that was spare when we put up a light fixture. I just used pliers to disconnect a piece the exact size I wanted and it worked perfectly.

The frame of the top of the box is a solid piece of wood so it was easy to screw into.. although I did have a problem because the screwheads were all too small to hold the chain..
so voila...


I used a washer to give me the extra circumference I needed.. and it worked beautifully. The chain is totally secure and adds a nice touch of shiney to the finished project.


The back looks like this..       The fold is secured with more of the Wundaweb .. It looked alright and was secure enough I think  just as a fold, but I wanted to err on the side of caution.. so I sealed it down.

And this is the finished article... Of which if I do say so myself.. I am very proud. All in all it cost $5 for the cube itself.. about $30 in total for all the fabric.. a dollar or two for the Wundaweb. The chain which was just hanging about in my 'odds and sods box' doing nothing and was therefore FREE, and two screws and washers.. and that's it. Plus once I had actually got my arse in gear to do it.. it really only took about 2 hours to do it.

All in all I'm very pleased with how it turned out.. and I think it works really well in the living room.


 I've got a couple of $10 side tables to show you next. I bought them from the local auction house.. and they have waited a similarly long time for their do over... but they're done now so I'll take some 'after' photo's and post them later in the week.

Jo xx

Sunday, May 22, 2011

I wish I could say I've been away...

Not going to make a big deal of why I've been absent from my blog for so long.. suffice to say that my motivation took a hit. Yesterday however I got a talking to from a design buddy and what he said has galvanised me somewhat.

I've decided this is excellent advice.
It's not even as if I don't have the time.. so I have no excuse and I'm going to stop procrastinating and get my arse back in gear... and for any of you out there in the ether who have bothered to bear with me.. Thank you !!
OK enough said.. let's get on with it.
Jo xx

Friday, December 3, 2010

Royston. 1st of the Christmas Tour homes..

OK.. so on to more cheerful things..
Last week I mentioned that I was hoping to get photos from a charity Christmas house Tour to share with you guys, and I'm happy to say that of the 5 houses on the tour I have photos of 4.

The organisation that puts together the event is a local charity called the Anderton Theraputic Gardens Society.

Every year they put 5 local designers together with 5 home owners, and the partnerships work together to put on a creative and original display of Christmas decorations for ticket holders to enjoy.

This was the 5th annual event, and it has quickly become a firm favourite in the local pre Christmas events calender.

So let's start with the largest of the homes on display this year in a small community just south of Courtenay called Royston.
This beautiful newly built West Coast home sits on a small acreage of mature trees, providing the perfect sanctuary from life's stresses.

Photograph courtesy of the ATGS.
The home owners searched for more than a year to find the perfect spot and then waited another 18 months before the stone and timber home was ready to move into. Now looking forward to just their second Christmas in their new home, it's clear that they feel the wait was worth it.


This is the sight that greeted us at the entryway.. The soaring timber ceilings warming a space that might otherwise feel intimidating... but which in fact feels homely and welcoming.  
Turn left and you discover a comfortable seating area with a gorgeous roaring fireplace, and three feature Christmas trees. One gold, one silver and one red.

By the way, I know it has nothing to do with the decorations per se, but the coffee table is indeed a genuine Noguchi. The home owner proudly pointed out the signature etched into the glass... found only on original pieces. It is a thing of beauty to be sure.

The dining table was set for guests. I particularly liked the decorations created for the backs of the chairs. Essentially a very simple concept but very effective, and something any of us could achieve in some form or another.  The deep wine colour and gold accents on the table were pulled from the rug below. Elegantly festive.

The light fixture was impressive and imaginatively handled... and I dare say could have seemed a little OTT but for the huge scale of the room. As it was though I think it was my favourite piece of all. The long chains of real crystal came from the decorators own collection, and added a lush  sparkle..   providing a nice counter point to the natural elements in the design. 


Here's a particularly pretty view across the table to the living room beyond. You can really get an impression of the sheer scale or the space.
I should mention at this point that the decorator responsible for all this is local design maven Judith Moore, who together with collegue Alice East used a combination of the home owners own decorations, and others contributed from local stores including Judith Moore Interior Design. Plus of course as I've already said, pieces from Judith's own personal collection.

To the right of the dining area is the kitchen, complete with granite counters, gleaming stainless steel appliances and an enormous central island. There is plenty of room for guests and enough space, in the home owners own words... 'so that two people can work together without bumping into each other'...   Since the units are in white.. my own personal favourite colour for kitchens..  it was always going to be a hit with me. I also loved the simplicity of the design, with plain subway tiles as a backsplash and wonderful granite floors that stretch throughout the open plan kitchen and dining area. But way beyond that, it again captures the relaxed feel that is so prevelant throughout the whole house. Quite an accomplishment in such a grand home.
What Christmas decor there was in the kitchen was simple and low key.. which is exactly as it should be.

So there you have it.. the first home on our grand tour..  I'll just include one more photograph, again not really of the decorations, though there are some on top and inside.
But of a simply fabulous pine display cabinet that the home owners had custom built for them in Italy.
During the construction porcess, the home owner discovered that the alcove you see above, designed specifically for this piece, was being built only about half the required width. Luckily he spotted the error before too much work had been completed, but he jokily points out the the downstairs loo [which is behind this wall] is now tiny and L shaped, because about 4 feet was pinched from it to create an alcove big enough for this monster.

So thank you to the event organisers, designers and home owners for all their help and co operation.. which enabled me to create this post.
House number 2 early next week..
Night all..

Jo xx


Wednesday, December 1, 2010

Nikki the Wonder Dog....

Not really in keeping with the usual subject matter of this blog but I can't help that just for today..
This post is in loving memory of our puppy Nikki who we had to put to sleep yesterday.
I'm not going to bother you all with the details.. suffice to say that she was 15 and a half and she'd had a very good and happy life... and I want this to be a celebration of her, and NOT at all maudlin.

'Go away.. he's mine'... 'oh and btw I look good from this angle don't I !' 

When I first came to live in Canada about 8 years ago, Nikki had already been with Bill for almost 7 years.. and she was very put out at the arrival of a new woman in HER house.
When I first arrived I got a lot of looks like the one above [and the one below for that matter] from her ladyship.. unlike her older brother Norman, who adored me from the off.

Norman did not care for photos.. Nikki in the background is sulking, as you can see.
But then Norman liked to nip noses and Bill wouldn't let him do it to him.. so I guess I was an easy target.
Then Bill went away for 6 months, posted to the middle east and Nikki and Norman and I were pretty much on our own.. and over the course of those long long months we fell into a happy state where we all just sat sprawled on the sofa eating chocolate.
I also taught her to walk off the lead and obey commands, like sit, which she really got quite good at, and stay.. which she did when SHE felt like it.


One of our favourite indulgences was always for her to crawl in next to me after Bill went to work at 6 in the morning. Especially after Norman died in 2005.. then it was just us girls for most of the day.
Of course it wasn't always necessary for me to be there at all...
Mummy is quite surplus to requirements actually.
Those are Bill's pillows she's asleep on.. I guess she could smell him, so it was always a favourite place.

So over the years Nikki and I came to an understanding... I was the head bitch in the house, and I made the rules.. and I had HER permission to say so ;o) .
That having been said she was always a daddy's girl.. as evidenced here by her ability to jump and sit on this precariously soft foot stool so she could watch out of the window for his return from work one day. I found her like this, having come in from the garden to find out what she was doing..
Just waiting Mummy.

Bless her.. Nikki awaits the return of the chief.
And although over time I came to be a very close second, Bill was always her favourite.. quite naturally, and I wouldn't have had it any other way.

She liked to sleep when he slept..


 And work when he worked.. or played for that matter.

'Manchester United will win that one daddy, better put Berbatov in your team'..
Now that I come to think of it she liked to sleep a lot... and even though we had had her 'fixed' so to speak.. she wasn't always alone..

Please forgive the faux fur.. it was hiding a REALLY ugly Laz-y-boy.
She was an absolute tart when it came to having her picture taken, and unlike Norman who's backside I have dozens of shots of.. since at the first sight of a camera he would turn tail and flee.. she was ALWAYS front and centre when it came to photo time.

Flower girl at my sister's wedding in 2008, in our garden at home. 
She LOVED to sun herself.. and was always able to find a sunny spot, usually at the top of the stairs where the sun streams in through the sky light.
Or in the garden....
Just last August on the now much greener grass out the back.
Or on the brand new carpet that we had just had laid in the living room, before any of the furniture had gone back in..

Dreaming of digestive biscuits, or chasing the ducks at the pond, no doubt.
And she never looked cuter than in this is the last photo I took of her, last Thursday.
She had just had a rather severe hair cut and was feeling a little chilly round the nether regions what with all the snow.. but that didn't stop her posing for a series of shots from all angles..


So there you have it... Nikki the wonder dog.
Almost everything was entirely on her terms.. she loved you when she wanted you, she was aloof when she didn't. But she was our dearest companion and we loved her more than it's possible to say with just stupid words.
I'm going to end with my very favourite photograph of Nikki and Norman with Bill on Airforce beach from the summer of 2005..


Rest In Peace darling girl.. we will always love you.

Mummy xx

Of course Bill has his own perspective which is beautifully heartfelt..
He's such an old softie, and he adored that puppy.